Sunday, August 10, 2008

1/72 EA-6B Prowler


Another Hasegawa Prowler. This time, I replaced the kit seats with resin examples from True Details. These are great seats, but they turn out to be a little wider than the space for them in the kit cockpit tub. Some judicious sanding of seats and tub was required to get them to fit, but the finished product doesn't really show it. I also used the Eduard photo-etch set to dress things up (especially the cockpit).

The decals were from the kit - I wanted to do a VMAQ-2 bird from the days when they were still the Playboys, before the political-correctness witch-hunts of the early 1990s. The white paint is Tamiya XF-2, the gray is from Gunze, and the tan and black are from Testors. I'm becoming an increasingly big fan of both Tamiya and Gunze acrylics.

It will be last one I get to do for a while, as soon I have to move.

Kit: Hasegawa
Scale: 1/72
Markings: VMAQ-2
Date: 2008
Aftermarket: True Details resin seats, Eduard photo-etch brass detail set

Tuesday, April 22, 2008

Caught Up

If there are any regular visitors, you've noticed a definite slow down in posting!

That's because the "gallery" (if you will) is caught up. I'm about halfway through the next project and will have an entry for it when I finish.

Thanks for checking it out!

Saturday, March 29, 2008

1/72 F/A-18 Hornet


It's not often (read: almost never) that I think a kit is a total dog, and I sort of pride myself on the fact that I'll build damn near anything. But this one was pretty bad. It almost didn't get built.

Even after assembling it I have no idea as to it's pedigree. I saw no discernible manufacturer's name or emblem on the box or instructions. It was one of those last minute E-bay scores - finding something ending in the next few minutes that was only going for 99 cents. At least I wasn't out a lot of money.

The seat looked like something from the set of a bad 60s sci-fi show, and the side console detail was 3 raised rings on each side of the cockpit - as if the plane came equipped with 6 drink holders. I was not interested in scratchbuilding a cockpit, or cannibalizing another kit. But I decided I could use it as a "test bed" for a painted canopy.

Sometimes in this hobby, folks will recommend you try a new technique out on a "throw away" model first - well, I don't really have any throw away models. But I did have one that could only improve! I also decide to try making an inflight display, something else (along with the opaque canopy) I hadn't done before.

The canopy was painted blue from the inside after having been coated with Future. It was masked for the framing then installed (and the gaps around it filled with white craft glue - which dries clear, won't craze clear plastic, and can be shaped while wet with a damp Q-Tip, meaning no sanding marks on your canopy). The supports for the inflight display are 2 K&S aluminum tubes bent to shape and cemented into a wood base I grabbed at Wal-Mart.

To make it look somewhat interesting, I used Superscale decals for "Strike U", and made a TACTS pod out of a Sidewinder missile. Weathering was with pastels.

Kit: ???
Scale: 1/72
Markings: Naval Strike Warfare Center ("Strike U")
Date: 2008
Aftermarket: Superscale Decals, K&S aluminum tubing

Wednesday, March 26, 2008

1/48 EA-18G "Shocker"


No, I'm not calling a "Growler." That's a ridiculous name.

I started with the Italeri kit, as it's the only 1/48 -18G out there right now. It has it's shortcomings - aside from temperamental fit, the basic airframe itself represents an early block F and there are some changes to be made both to the basic airframe and to represent the electronic warfare gear that got added on. You could use a Revell F/A-18F, but you'd have to come up with the wingtip receiver pods, the ALQ-99 jamming pods, and even then you'd still have some of the add-ons to make yourself.

The cockpit is basic, and the panels/consoles are represented with decals. I replaced the aft instrument panel/coaming with a resin part from Steel Beach, which represents the ACS crewstation in the back of the G's.


Main assembly is pretty straightforward, but the engineering and parts breakdown does invite some fit issues, as you can probably see from all the green. There's also the issue of "early" Super Hornet features that need to be corrected, such as these square-shaped holes in the wingroot and the pieces that go in there.


Add-ons include a more or less conformal antenna on the spine (it's saddle shaped), wing fences, antenna blisters on the side of the nose and near the horizontal stabilizers, and in the case of the Italeri kit, the IFF interregator.

The kit's molded ECS exhausts (between the tails) are also incorrect and need to be replaced - Steel Beach also makes resin parts for these, and Darren Roberts was kind enough to send some along with the ACS instrument panel. Also, in the picture below, you can see the fairing at the 'dogtooth' in the wing leading edge, another unique feature of the EA-18G.


The external stores are 3 ALQ-99 jamming pods from Cutting Edge, 2 AGM-88 HARM from the kit (stripes from a Hasegawa weapons set decal sheet), 2 AIM-120 AMRAAM from the kit, and drop tanks from the kit. The last Italeri inaccuracy here was the pylons - they're inaccurate for any Super Hornet, and you'll need to rob a Revell kit - or have a generous friend willing to part with the pylons from one of HIS Revell kits. In my case it was the latter, thanks to the generosity of Brian Marbrey.

I went my own way for markings. Italeri gives you a choice between VAQ-129, the fleet replacement squadron, and VAQ-209, the reserve squadron. It's an open question as to whether or not VAQ-209 will make the transition to EA-18Gs or be disestablished when the Prowler is finally retired, so I wasn't too keen on that one. And I didn't really dig the conceptualized FRS markings in the kit. So while I used the kit's stencils, numbers and whatnot, I raided the decal stash for an old Superscale sheet for squadron markings, putting the bird in VAQ-137 colors (my former fleet squadron). The oversized air wing tailcode on the inside of the tails is not quite congruent with current "big Navy" dictates, but I'm sort of hoping the VAQ community will stand it's ground when it comes to more creative paint schemes. A guy can hope...


Kit: Italeri (and parts from Revell)
Scale: 1/48
Markings: VAQ-137
Date: 2007
Aftermarket: Steel Beach ACS cockpit and ECS exhaust, Cutting Edge ALQ-99 pods, Superscale decals

Saturday, March 15, 2008

1/48 F-14D

This was the first project I've done intending to give to someone else (though truth be told, I haven't figured out the logistics of getting it to its recipient yet...).

The kit is Hasegawa's F-14D, with the addition of Eduard's "Big Ed" photo-etc set and TwoBobs decals.

Here's what Eduard's set buys you with the ejection seats:


And here's what it gets you in the cockpit:


Construction is relatively straightforward. Hasegawa's Tomcat is what some might call over-engineered - more parts than are really needed to make the kit work. While this admittedly complicates assembly, it also allows the company to put out different versions of a subject. To me, this flexibility makes it worth the added effort in assembly. Another manufacturer might label the box "F-14D" but to get an accurate portrayal you might have to do a lot of work to what is REALLY a model of an F-14A, for example.

It took me two tries to get the cans right, because I forgot that in the D you don't generally see the "one open, one closed" thing like you do with the A's. But it was easy enough to get right. They were painted with Alcad.


The friend for who I built the model flew F-14Ds in OIF, so I endeavored to arm it appropriately, using Hasegawa weapons sets. To create the ablative coating on the bombs, I worked one at a time, coating a bomb with ProWeld (Tenax or any other similar cement would work just as well - you could probably use lacquer thinner too), then dabbing at it with the coarsest sandpaper I had while it was still soft. I mounted them to the model using small lengths of wire.


Painting was fairly straightforward, using Testor's Model Master gull gray for most of the plane and Ford Engine Blue for the accents.


I used Two Bobs' decals for VF-213, the squadron my friend flew with.


The base is a Custom Dioramics section of carrier flight deck mounted in a picture frame. I elected to put it UNDER the glass for durability, given that I intend to part with this EVENTUALLY.

Now to hope I can get it to its intended owner before they find it online!!


Kit: Hasegawa
Scale: 1/48
Markings: VF-213
Date: 2007
Aftermarket: Eduard photo-etch, Hasegawa weapons, Two Bobs decals

Friday, March 7, 2008

General Lee


Every once in a while, it's cool to venture outside your normal "genre" and try something different.

This is the first car model I've attempted since I was in junior high, back when I was applying heavy, sloppy coats of Testor's gloss enamels (which may still not have fully cured).

Knowing my affinity for modeling, and recalling my enduring appreciation of The Dukes of Hazard television show, this kit was a Christmas gift from my family, and I undertook it as a break from some of my more involved aircraft projects.

To be honest, gloss finishes still rather intimidate me, however I found Gunze Aqueous Hobby Color to be pretty idiot proof in its application (even if I did choose an orange that was a shade or two too light). To protect the decals I applied Future floor polish full strength though my airbrush. Not a flawless job, but better than I had anticipated!

Kit: AMT/ERTL
Scale: 1/24 (I think)
Markings: "General Lee"
Date: 2007
Aftermarket: None

Saturday, February 23, 2008

1/48 EA-6B Prowler

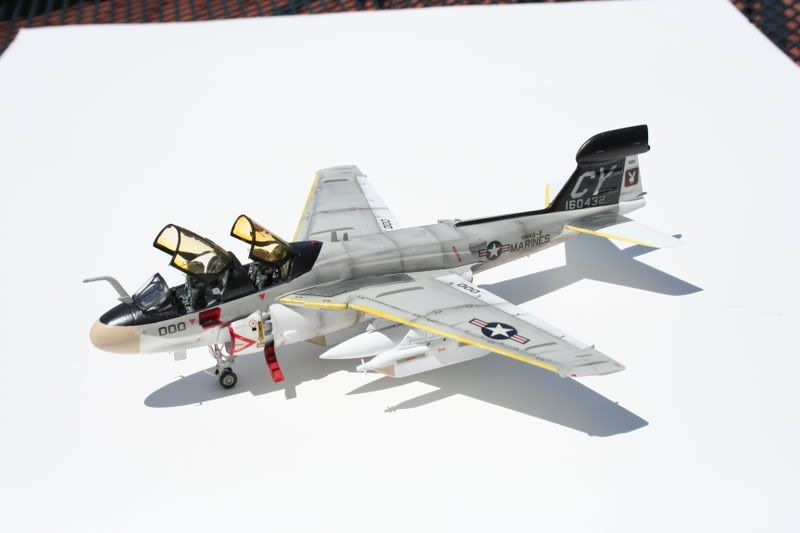
This one is currently the star of the collection for a couple big reasons. One, I'm a Prowler guy by trade so there's a bit of sentimental value in the airframe for me. Two, it represents my fleet squadron (though from a couple cruises before I showed up). Three, it's the most extensive conversion project I've done so far.


The kit is from Monogram. While the overall shape is right, and fit is decent, there's some work to be done to make this actually represent a Prowler. Monogram basically took their Intruder and gave it an extra cockpit and the "football" on the tail. Unfortunately, that doesn't quite cover all the differences in the airframes. Oh, and kit has raised panel lines too.

The first thing I corrected was removing the armor plating on the underside. The Intruder had extra armor on the outside of the engine compartments - the Prowler does not. Apologies for the bad picture quality - but hopefully you can make out that on the left is a fuselage half which has already had the armor plating removed (I used a coarse sanding drum in a rotor tool to start out, then cleaned it up a bit with sandpaper). On the right is a fuselage half with the armor plating still present, but marked for removal (a big "x" from a Sharpie).


Below is one of the fuselage halves just before joining. You can also see where I cut away the HF antenna on the spine and an inlet scope on the intake trunk, both of which were replaced with resin parts from the Cutting Edge set (now just recently out of production with Meteor Productions' closing). I did most of my rescribing here, where it was a bit easier to manage. I used both a scribing tool and a needle chucked in a pin vise. Truth be told, I think I prefer the latter. You can also see the Black Box cockpit and ejection seats just about ready to install.


Here is the cockpit installed. Next time I do this project, I will remove more excess resin from the sides of the cockpit tub - as you can see here, the aftermarket part proved a little wide and there was a lot of filling to be done at the joint between the fuselage halves.


As molded by Monogram, the kit gives you the option to lower the left boarding ladder, but gives you no choice for the right side (or for the platforms that give access to the front cockpit). I cut away the kit plastic on the right side and used sheet styrene to make my own boarding ladder for the right side before attaching the front portion of the intake. I also carefully bored out just enough plastic to show the boarding platforms up front in their open position.


The kit part for the tailhook and expendables dispenser included another A-6 feature not seen on the Prowler - a bulge for a doppler radar used in terrain following. This feature was big enough that grinding and sanding if off left a hole that I had to patch with sheet styrene and putty.


Next came the wings. I used Paragon resin wing folds, which require you to cut the wings in half and remove a bit of plastic on either side of the cut. On the outboard half of each wing, there's also a section of flaperon to remove, as it will be replaced by a resin piece to show the characteristic "droop" seen when the wings are folded. In this picture, I've cut the left wing in half and installed the inboard half of the wingfold. The left flaperon is marked for removing. Next time I do this, if I use Paragon's set again, I will do some more sanding on the upper and lower wing pieces to try and thin the cross section a bit - as it happened, the kit wings wound up being much thicker than the Paragon parts which led to quite a bit of work to blend everything together.


In the picture below, the left wing is basically all assembled and I'm in the process of blending everything together. The right wing is all cut and ready to be assembled.


Now I could start painting. I did the white gear wells (and, while the airbrush was loaded, ladder wells and other white parts ) first, before attaching the inboard wings which would have really complicated things. I also painted the exhaust pipe, half of which is on the fuselage and half on the wings. There's some removing of kit plastic to do on the underside of the wings too, and some resin to add if you're fortunate enough to have gotten your hands on the cutting edge set. In this picture, I've still got to blend some of these parts a bit before spraying the first coat of gray.


I masked the gear wells, ladder wells, and cockpit, then sprayed the first coat of gray on the fuselage as part primer, part checking-my-work. You can see here there was a bit more touch-up sanding to do. I also shot the rudder white now, before doing much more with the gray.


Here we are with the three shades of gray sprayed -


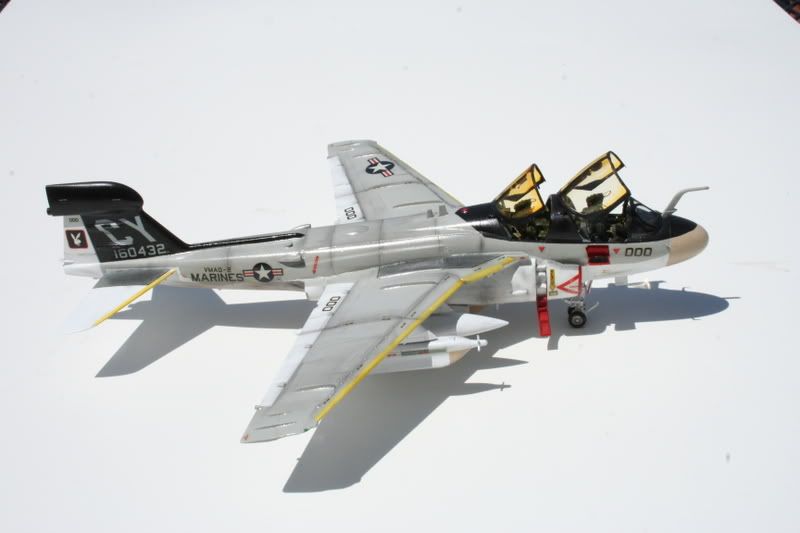
Here's with the a gloss coat (Future floor polish) and speedbrakes painted white (yep, I had forgotten) as well as red brush-painted on the boarding platform wells... the undersides of the flaperons would also get red.


Here's with the decals applied, ready for a flat coat and some more assembly.


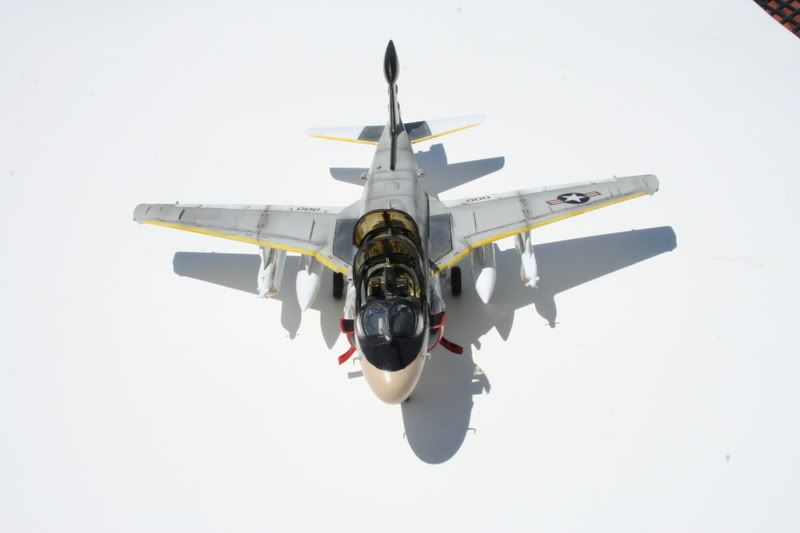
At this stage I started doing some more detail work - stuff I figured would fall off during the painting and decalling stage. I made the USQ-113 antenna out of laminated styrene sheet cut to match photos. I also used fine styrene rod to make the V-shaped deflector on the underside (it helps keep leaking engine oil - it's a Grumman plane, you know - from being blown by the slipstream back into the avionics bay, where there's also liquid oxygen).


Having carved the right ladder well out of the kit, I had to make the right ladder from scratch. I pieced it together from sheet styrene to match the left one. Forward of the right ladder is a cover for the AOA probe - on the real thing, the cover is spring-loaded and pops out and forward when the ladder is opened. I carved out the recess where the cover sits when the ladder is closed and shaped the cover itself from scrap styrene, painting it red. Behind the aft cockpit, there is a dome-shaped GPS antenna I shaped from CA adhesive. Finally, I laminated sheet styrene to make the front boarding platforms. After that, it was just attaching the rest of the blade antennae, underwing stores, outer wings, and canopies.


You can read the more in-depth article about this project here.


Kit: Monogram
Scale: 1/48
Markings: USN, VAQ-137
Date: 2007
Aftermarket: Cutting Edge correction set, Black Box cockpit/ejection seats, Paragon wingfolds, Aeromaster decals